The Destination second level page controls the destinations in the system.
Click on Administration to open the sub-module list. Click eViridis Administration to open the second level page list. Choose Destination.
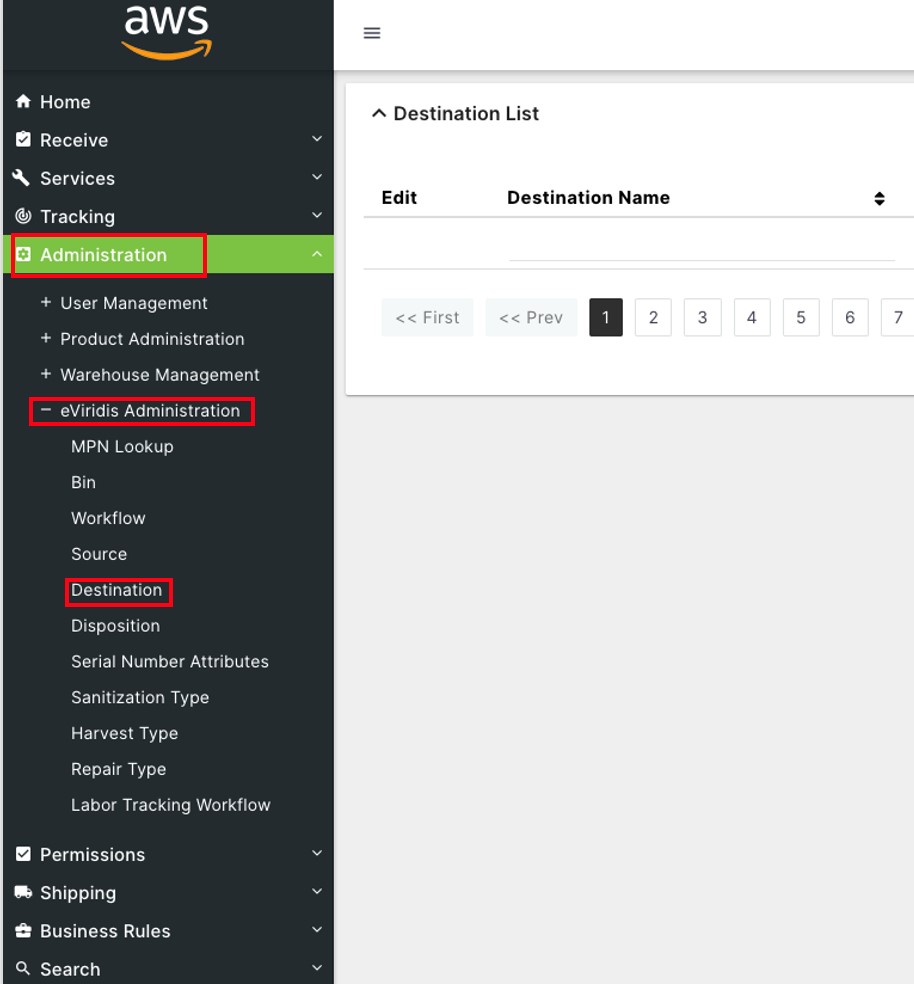
On the Destination List page, click  to sort by Destination Name, Destination Category, Street Address, or Payment Method.
Type in the space below any of the above header categories to filter them.
Click + Create New Destination to add a new destination to the system

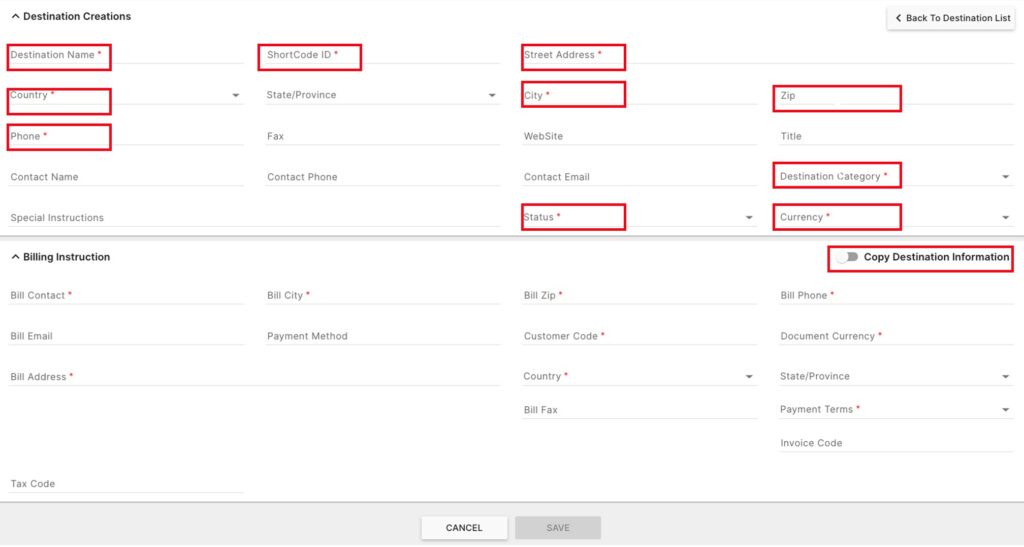
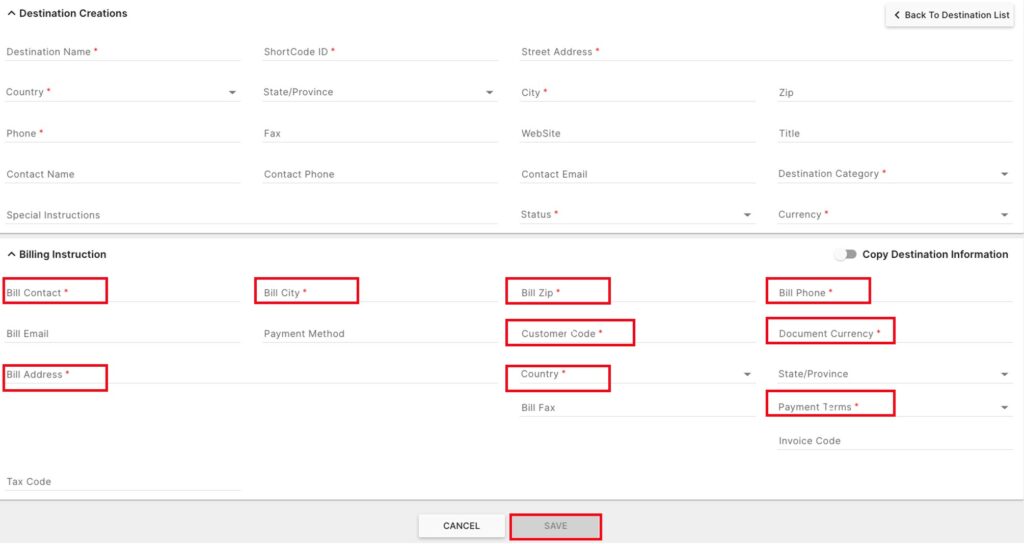
In the Destination Creations section, enter a Destination Name, ShortCode ID< Street Address, City, and Phone. Choose a Country, Destination Category, Status, and Currency from the drop-downs.
Optionally, enter a State/Province, Fax, Website, Title, Contact Name, Contact Phone, Contact Email, and Special Instructions. If the Billing Instruction address details are the same as the destination address, click  Copy Destination Information to turn it green
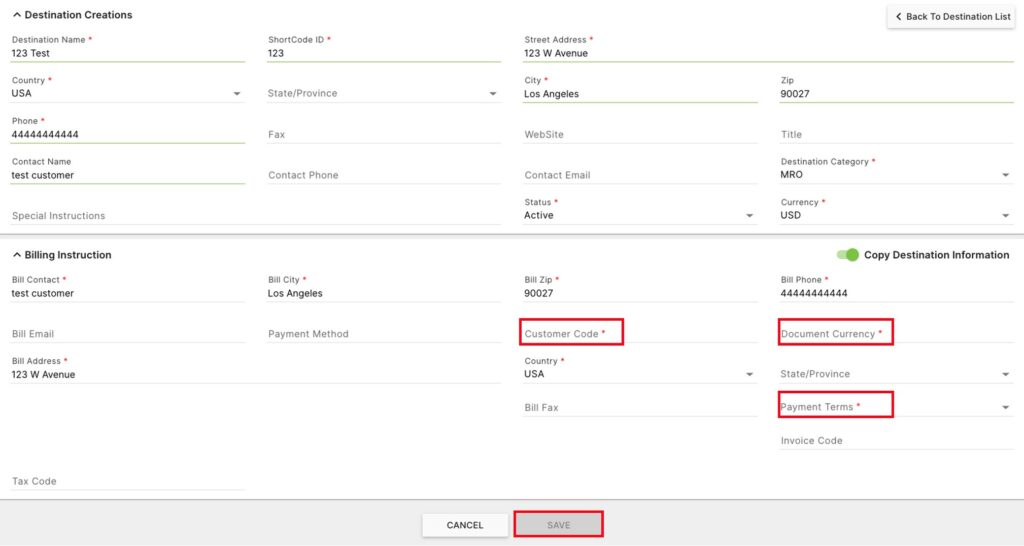
After the destination information has been copied in the Billing Instruction section, enter a Customer Code and Document Currency. Choose Payment Terms from the drop-down, and click Save.
Optionally, enter a Bill Email, Payment Method, State/province, Bill Fax, Tax Code, or Invoice Code and click Save
Alternatively, if the destination information is not copied, enter a Bill Contact, Bill City, Bill Zip, Bill Phone, Bill Address, Customer Code, and Document Currency. Choose a Country and Payment Terms from the drop-downs and click Save.
On the Destination List page, click on the  button to Edit a destination.

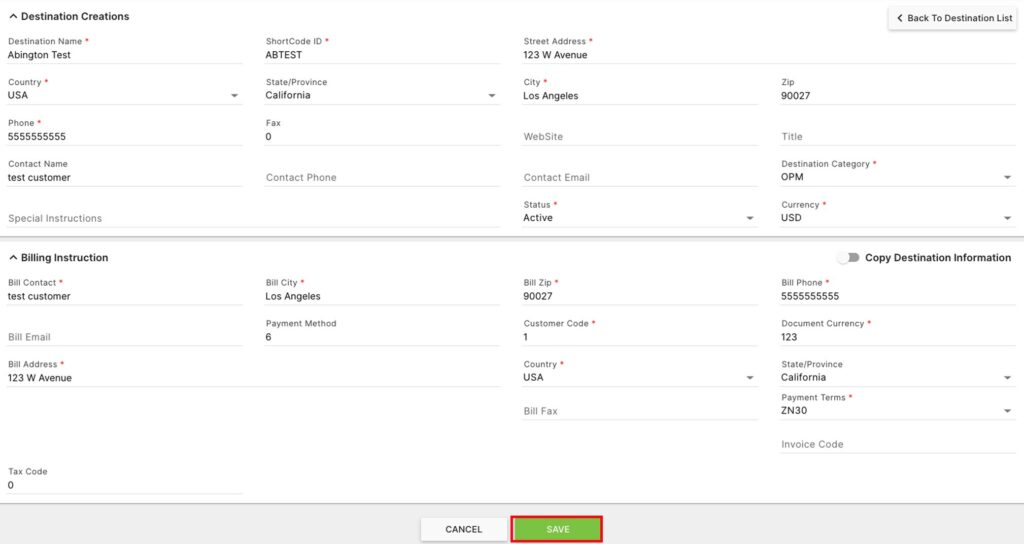
Update any of the fields for this destination (Destination name, ShortCode ID, Street Address, Country, State/Province, City, Zip, Phone, Fax, Website, Title, Contact Name, Contact Phone, Contact Email, Destination Category, Special Instructions, Status, Currency, Bill Contact, Bill City, Bill Zip, Bill Phone, Bill Email, Payment Method, Customer Code, Document Currency, Bill address, Bill Fax, Payment Terms, Tax Code, or Invoice Code), and click Save.