This page allows users to upload pending shipments and track the details of newly received shipments of assets and containers.
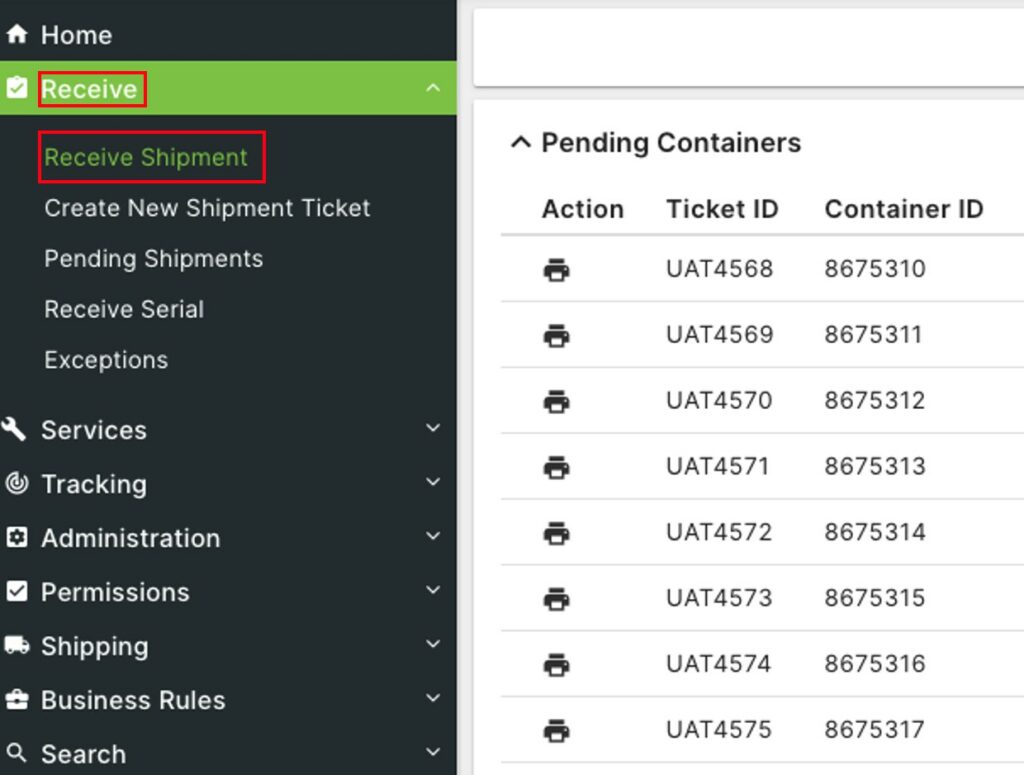
Click on Receive to open the sub-module list. Choose Receive Shipment to enter a new shipment.

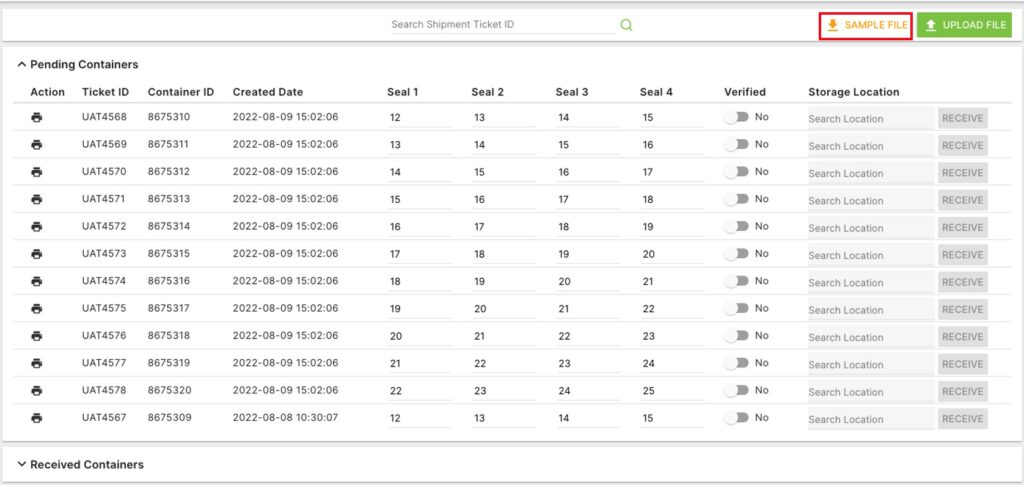
Click the Sample File button to download the shipment upload template to excel.

In the sample excel file, enter the actual origin_location_id, origin_ticket_id, containter_id, seal1, seal2, seal3, seal4, serial_id, and mpn_id.
If the origin_location_id field does not match to an active Source, the records will not upload into the system.
Save the file.


Back on the Receive Shipment page, click Upload File


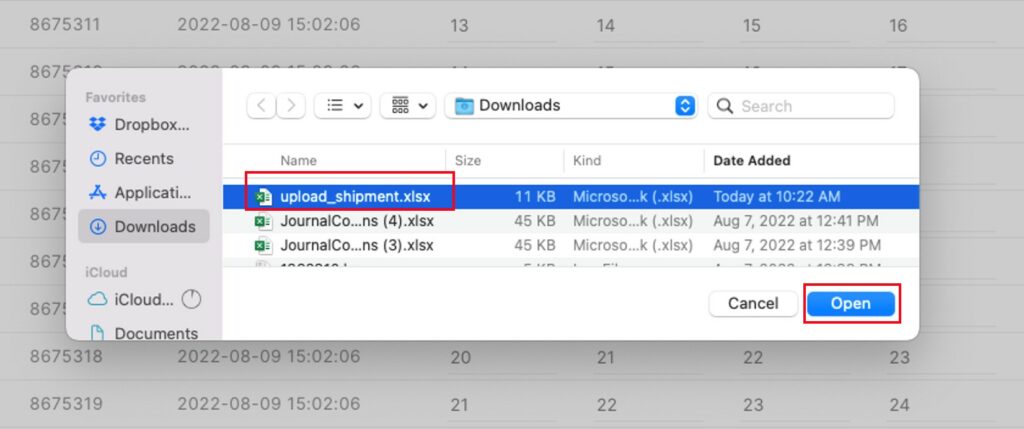
Find the file to upload and click Open.

The uploaded shipments will appear at the top of the Pending Containers list when the upload is successful.


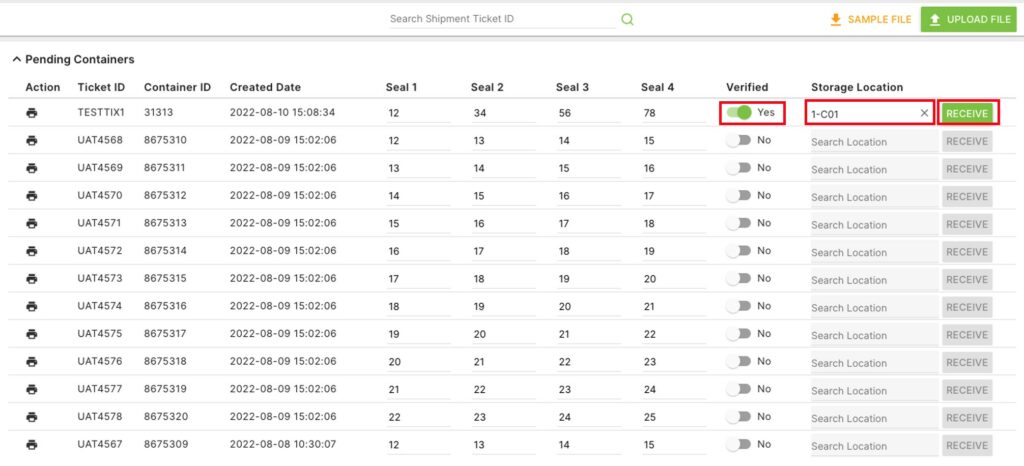
Users will need to confirm when shipments created in the system have been received at the facility.
For the received shipment, click the ![]()
![]()


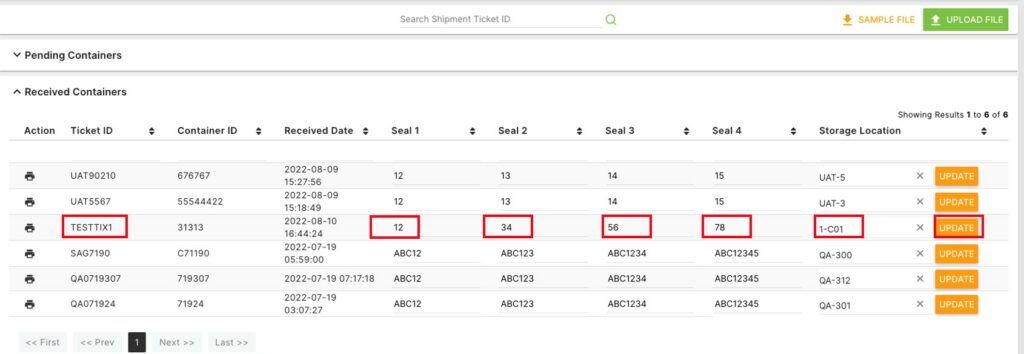
The received shipment will move from Pending Containers to Received Containers. Here, the user can edit Seal 1, Seal 2, Seal 3, Seal 4, and the Storage Location. Save these changes to this shipment by pressing the orange Update button.

Click the ![]()


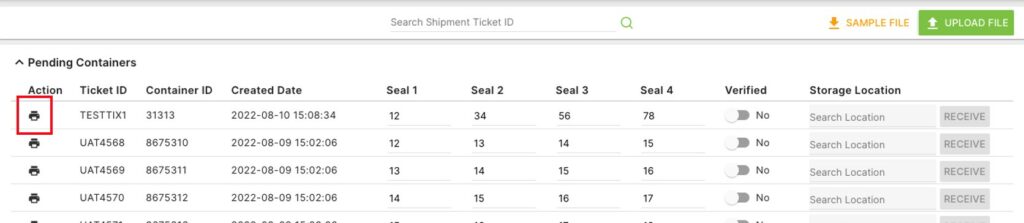
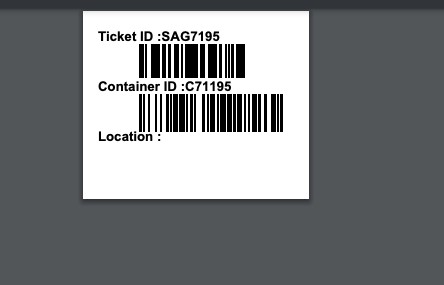
Print the Receive Label from the pdf and attach to the received shipment.